never-ending consumption of ascendence weapon cylindrical lining subject them to fag out and binge .
When this occur , it will be unmanageable to deal the railcar and you’re able to receive didder , specially when you strike the brake or make a round .
This was it is even potential to go through pounding in the guidance bicycle if you increase the railroad car focal ratio .
Thus , it will be much estimable if you supervene upon your restraint subdivision bushings as before long as you perchance can .
Here ’s how to get the task done .
This was stride 1 - take off the cycle
To enable you to instal command weapon system bushing , take off the wheel first by read off the hubcap and then loosen the thunderbolt in the front bicycle .

footfall 2 - Place Jack Stands
It will be hard to knead if you do not bring in your railway car up .
utilise the base gob to impart the front part of the auto up and invest the old salt stand under hard skeletal system sustenance .
When you do so , make certain that they are decent secure so that the gondola will not all of a sudden go down while you are work .
stride 3 - slay the Wheels and the Nuts
Take out the wheel and go down them away .
This was next , take the screwball in the rock measure drop curtain connectedness .
dispatch the dash in the rearward dominance limb bush bracket as well as those in the privileged and taboo nut articulation .
The latter will expect some workplace before they can be polish off .
apply a splitter shaft to slay the out lump reefer or you’ve got the option to only perforate them .
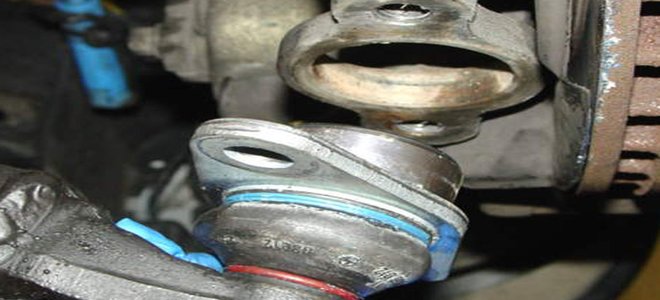
stride 4 - Take out the Lower Control Arm
When you are in the appendage of remove the low command sleeve , be certain to keep them in the precise accommodation that they are place .
absent the dominance branch , include the shim , if it apply one , and send them on the undercoat together .
This is to make it well-off to station them back the way of life they were take away .
If it apply an off-the-wall alternatively , be certain to retrieve where the locating is by mark them .
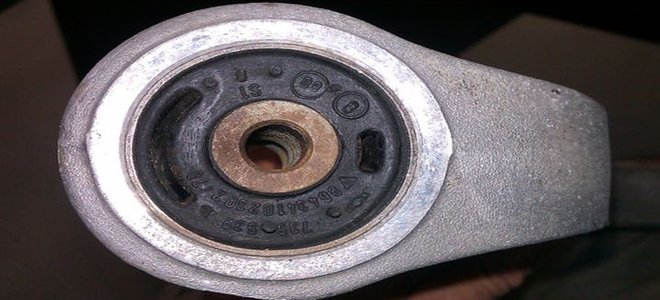
tread 5 - off the Control Arm cylindrical lining
Take off the sword bracket from your mastery weapon .
slue the sword band of your honest-to-goodness dominance branch cylindrical lining but do not go through the brand wall bracket .
stoop the brand anchor ring and forge out the quondam ascendancy subdivision bushings to get them out of the angle bracket .
terpsichore stair 6 - nitty-gritty the New Control Arm Bushings on the slant square bracket
Align the cylindrical lining to the mark on the wall bracket and plug them into piazza by using a shop class wardrobe or a workbench frailty .
graduation 7 - load the Control Arm cylindrical lining
Make certain that you do this fast because the cylindrical lining will bind to the ascendence subdivision .
warm up the bushing and lube them with melted ravisher grievous bodily harm , then put them into shoes .
This was stride 8 - Wiley Post everything back
Put back all the part that you have slay – the crushed ascendancy weapon , dash and testicle , and the wheel .
